
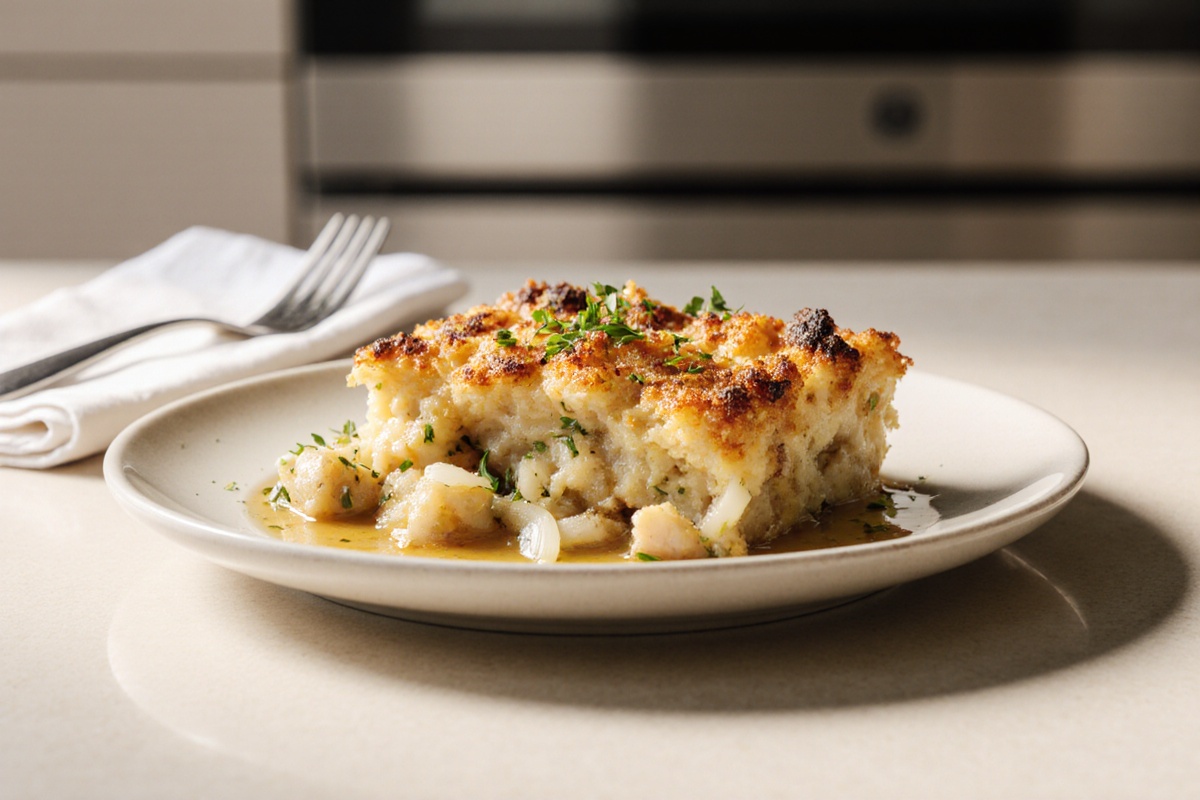
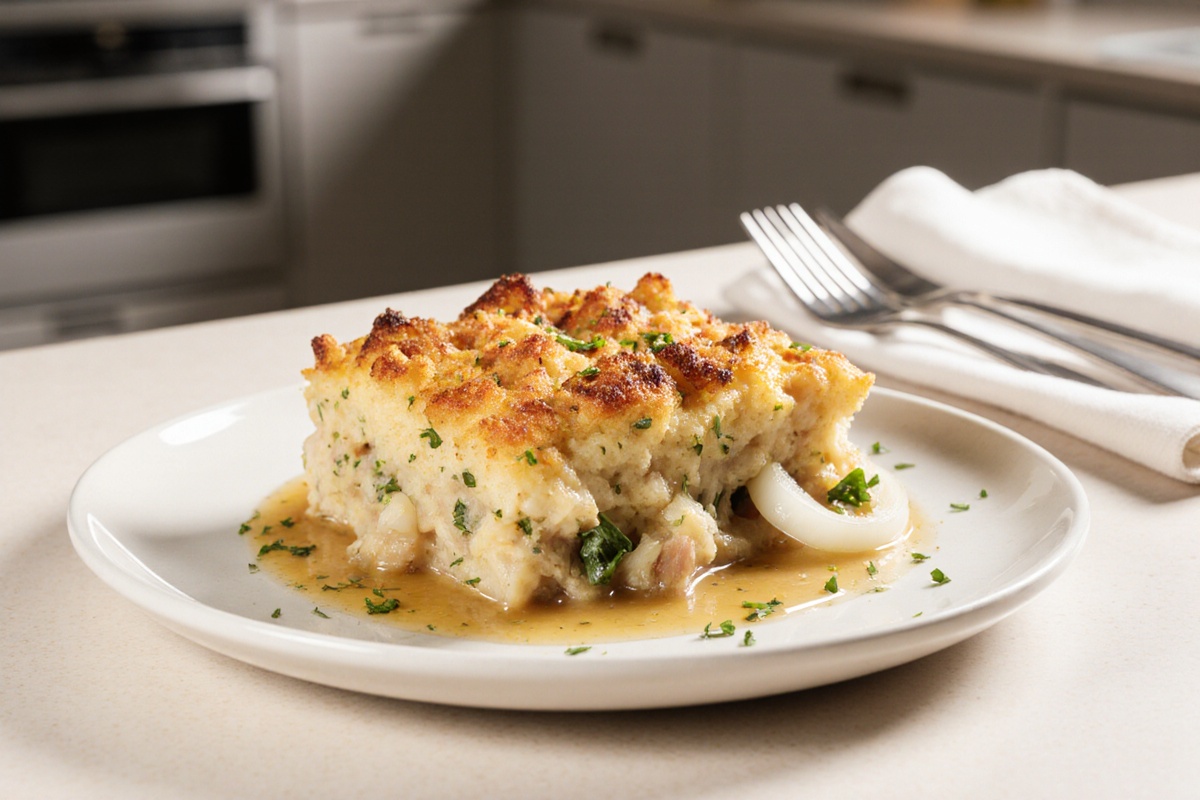
Rotisserie Chicken Stuffing Casserole is one of those dishes that wraps you in warmth and comfort. The moment it hits the oven, the smell of savory chicken mingling with the buttery stuffing fills the kitchen, making it feel like home. I love how this dish comes together so quickly after a long day — it’s perfect for busy weeknights or a cozy weekend dinner. Plus, you can toss in your favorite veggies for a little extra nutrition and flavor. Trust me, once you try this, it’s bound to become a regular in your meal rotation!
Rotisserie Chicken Stuffing Casserole
Equipment
- Oven
- Air Fryer
- Large Bowl
- Baking Dish
Ingredients
Ingredients
- 2 cups rotisserie chicken shredded or chopped
- 3 cups stuffing mix
- 1 to 2 cups chicken broth low-sodium preferred
- 1 medium onion diced
- 2 stalks celery diced
- optional various veggies like spinach, carrots, or bell peppers
Instructions
- Step 1: Preheat your oven to 350°F (175°C) if baking.
- Step 2: In a large bowl, combine the shredded chicken, stuffing mix, chicken broth, onion, celery, and any additional veggies you are using.
- Step 3: Transfer the mixture to a greased baking dish and bake for 30-40 minutes until golden and bubbly.
- Alternatively, for air frying, set the air fryer to 320°F (160°C) and cook for about 20-25 minutes.
Notes
Nutritional Information and Health Considerations
Macronutrients and Vitamins
When I think about rotisserie chicken stuffing casserole, I can’t help but appreciate the hearty mix of nutrients. The chicken gives us a great source of protein, helping us feel full and satisfied. The stuffing usually contains bread, providing those essential carbohydrates for energy, and any veggies I toss in bring in added fiber, vitamins, and minerals.
Typically, a serving might have around 300-400 calories, depending on what ingredients I choose. I can expect to see around 20-25 grams of protein, plus some healthy fats if I add cheese or butter. It’s comforting and can also be balanced when I keep an eye on portion sizes.
Tips for a Healthier Version
If you’re like me and want to lighten things up a bit, here are a few easy swaps to consider:
- Use whole grain bread for the stuffing to boost fiber.
- Add more veggies like spinach, carrots, or bell peppers to increase nutrients and volume.
- Opt for low-sodium broth to cut back on salt.
- Limit cheese or pick a lighter cheese to reduce fat.
These small changes can make my casserole healthier without sacrificing that warm, comforting flavor we all adore. Remember, it’s all about balance and enjoying our meals!
Step-by-Step Recipe and Preparation
Ingredient Preparation
First things first, let’s gather our ingredients. I need some rotisserie chicken, stuffing mix, chicken broth, and my favorite veggies. For that classic taste, I like to add a bit of celery and onion, but feel free to get creative with your choices!
Here’s what I usually do:
- Shred or chop about 2 cups of rotisserie chicken.
- Dice one onion and two stalks of celery.
- Measure out 3 cups of stuffing mix and 1 to 2 cups of chicken broth, depending on how moist I want it.
Cooking in the Oven vs. Air Fryer
Now, I’ve got two great options for cooking this casserole. If I’m using the oven, I preheat it to 350°F (175°C). I mix everything in a large bowl, then transfer it to a greased baking dish. I bake it for about 30-40 minutes until it’s golden and bubbly on top.
If I’m feeling adventurous and want a quicker option, the air fryer works wonders too! I just set it to 320°F (160°C) and cook for about 20-25 minutes. I love how it gives that crispy top without heating up the whole kitchen.
Common Mistakes and How to Avoid Them
We all have those “oops” moments in the kitchen. Here are a few tips to help avoid common pitfalls:
- Dry Casserole: It’s important to add enough broth. If it looks too dry before baking, I just splash in a little more.
- Uneven Cooking: Stirring the mixture well before baking really helps everything heat evenly.
- Overbaking: I keep an eye on it! If the top is browning too quickly, I cover it loosely with foil.
With these steps in mind, I’ll have a cozy, comforting casserole ready to enjoy in no time!
Variations and Serving Suggestions
Regional and International Twists
- Mexican Style: I can add some diced green chilies, corn, and a sprinkle of taco seasoning for a zesty kick. Topping it with shredded cheese like Monterey Jack or a sprinkling of cilantro before baking makes it even better.
- Italian Flair: Incorporating some marinara sauce and Italian herbs like oregano and basil brings a lovely twist. I can even toss in some sautéed mushrooms and spinach for extra flavor and nutrition.
- Southern Comfort: I think about adding some sautéed onions, bell peppers, and a dash of hot sauce for a little heat. Using cornbread stuffing instead of traditional bread stuffing gives it a true Southern touch.
Best Side Dishes to Pair
This casserole is hearty enough to stand on its own, but if I want to round out the meal, here are some sides I love serving:
- Green Salad: A simple mixed green salad with a light vinaigrette offers a fresh crunch that balances the richness of the casserole.
- Roasted Vegetables: I toss some seasonal veggies like carrots, Brussels sprouts, or zucchini with olive oil, salt, and pepper, and roast them until they’re golden. The caramelized flavors complement the casserole beautifully.
- Garlic Bread: Because who doesn’t love a little bread on the side? A slice of warm garlic bread is perfect for soaking up any leftover sauce.
Feel free to get creative with your favorite ingredients and sides! This dish is all about making it your own, so don’t hesitate to experiment. And if you’re curious about chicken dishes from around the world, check out this great resource.
Step-by-Step Video: Rotisserie Chicken Stuffing Casserole
Frequently Asked Questions about Rotisserie Chicken Stuffing Casserole
Question: Can I use any type of chicken?
Answer: Absolutely! While rotisserie chicken is super convenient, you can use leftover chicken or even cook some fresh chicken if you prefer. Just make sure it’s shredded or chopped.
Question: How do I store leftovers?
Answer: Let the casserole cool completely, then cover it tightly and store it in the fridge. It should be good for about 3-4 days. Just reheat it in the oven or microwave until warmed through.
Question: Can I freeze this casserole?
Answer: Yes! Just make sure to let it cool completely before freezing. It can be stored for up to 2-3 months. Thaw it in the fridge overnight before reheating.
Question: What veggies can I add?
Answer: You can really get creative here! Spinach, carrots, bell peppers, or even peas work great. Just chop them up and mix them in with the rest of your ingredients.
Question: Is there a way to make this dish lighter?
Answer: Definitely! You can use whole grain bread for the stuffing, add more veggies, and opt for low-sodium broth. These simple swaps can help lighten it up while keeping that cozy flavor.
My Final Thoughts
There’s something so satisfying about pulling a golden, bubbly Rotisserie Chicken Stuffing Casserole from the oven. The crispy top and the warm, creamy filling make it a dish everyone gathers around. It’s perfect for sharing with family or friends, and I love how easy it is to customize with different flavors or veggies. Give it a try — I bet you’ll find yourself making it again and again!